This kit is recommended for use with most air conditioners when choosing to drain condensation to a 1/2" ID drain tube. Many Airstreams have a drain tube in their walls for this application. If you are restoring a riveted trailer and intend to use an air conditioner, we highly recommend installing the in-wall drain tube.
Allowing an air conditioner to drain onto the roof will water streaks on your trailer. On an aluminum vintage trailer, the discoloration is unsightly and the deposits can be hard to remove with polishing.
Installation of this kit adds only about 20 minutes to your air conditioner installation job.
This kit was specifically designed for Dometic Penguin, Brisk Air, and High Performance series air conditioners/heat pumps. However, it may work on other brands. See instructions
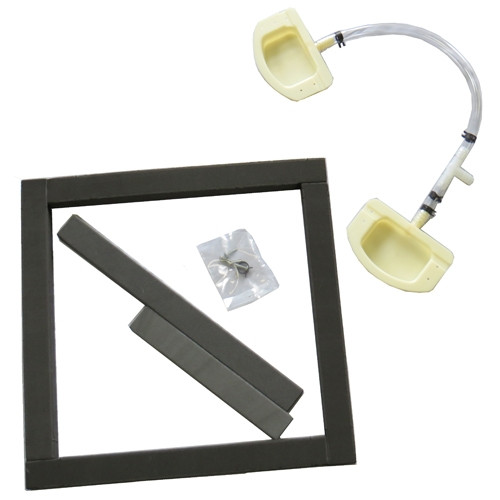
An instruction sheet comes with the kit but here are some additional tips:You will need to cut a gap in the sealing gasket that is installed by the factory on the bottom of the air conditioner. Install the cups first (you will probably need to remove a 1/4" hex head screw near or underneath each the two cup mounting locations). Use a couple of the provided screws to mount the cups to the underside of the A/C base pan. You are centering each one on the drain spouts.
Next, lay the drain hose on top of the gasket and trial fit it to the flanged spout so you know exactly where to cut the gasket.
Then remove the hose and cut the gasket right down to the base pan and remove the cut piece.
Install the drain tubing onto both drain fittings and be sure to attach the clamp before connecting to the fitting so it is already on the hose when you attach the hose to the fitting. Then move the clamp over the hose and fitting and it will make a tight seal.
Now completely fill in the gap you cut (a little over fill is fine) with Trempro 635. Do not use silicone. Be sure to get your sealant under the hose as well by lifting it slightly and then re-seating it in the sealant. The sealant fills in the gap and completes the water tight seal.
The final step is to add the second gasket right over the original so that you now have a double layer of gaskets. It should be self stick. just peel off the paper and apply. It should be identical to the original.
You are now ready to install the unit on your roof. Tighten the 4 bolts from the underside so that the gaskets compress approx. 50%. Connect the drain hose from inside the trailer and you are ready to install the air distribution box from underneath.
*Thanks to Lew Farber from Master Tech RV Systems for the tips above.